This plugin is life-changing. I’ve told Nicky it would be awesome to make the bass & duck communicate, and he’s done it! Just by moving the slope, I have a perfect sidechain for my kick.

Mixing in 2022 is more important than ever, especially for dance floor tracks. The kick is the most important element in most dance tracks and it really needs a proper place in your mix. This new version gives more hands on tools to shape the place of your kick in the mix, to make sure it has the perfect impact on the dance floor! Essential!
A sidechain tool I've been looking for my whole life. Thank you Nicky for letting me help during the development of the plugin. It's a must have tool!
An already powerful tool just got even better. Kickstart 2 comes with insane flexibility and awaited new features. The perfect side-chain pump plug-in just arrived… and she’s gorgeous.
This plugin is life-changing. I’ve told Nicky it would be awesome to make the bass & duck communicate, and he’s done it! Just by moving the slope, I have a perfect sidechain for my kick.
Mixing in 2022 is more important than ever, especially for dance floor tracks. This new version gives more hands on tools to shape the place of your kick in the mix, to make sure it has the perfect impact on the dance floor! Essential!
A sidechain tool I've been looking for my whole life. Thank you Nicky for letting me help during the development of the plugin. It's a must have tool!
An already powerful tool just got even better. Kickstart 2 comes with insane flexibility and awaited new features. The perfect side-chain pump plug-in just arrived… and she’s gorgeous.
Kickstart 2 instantly solves the problem of clashing, muddled kick and bass.
Forget fiddling about with compressors – Nicky Romero and Cableguys put everything you need for professional sidechaining into one fast, easy plugin. Just drop Kickstart on any track to instantly duck the volume with each kick drum, creating space for your bass.
Now your kick and bass will punch right through the speakers with professional impact, definition and groove. Use it for EDM, trap, house, hip-hop, techno, DnB – anything.

Use Kickstart in any DAW, for any style of music. EDM, trap, house, hip-hop, techno, DnB, and beyond
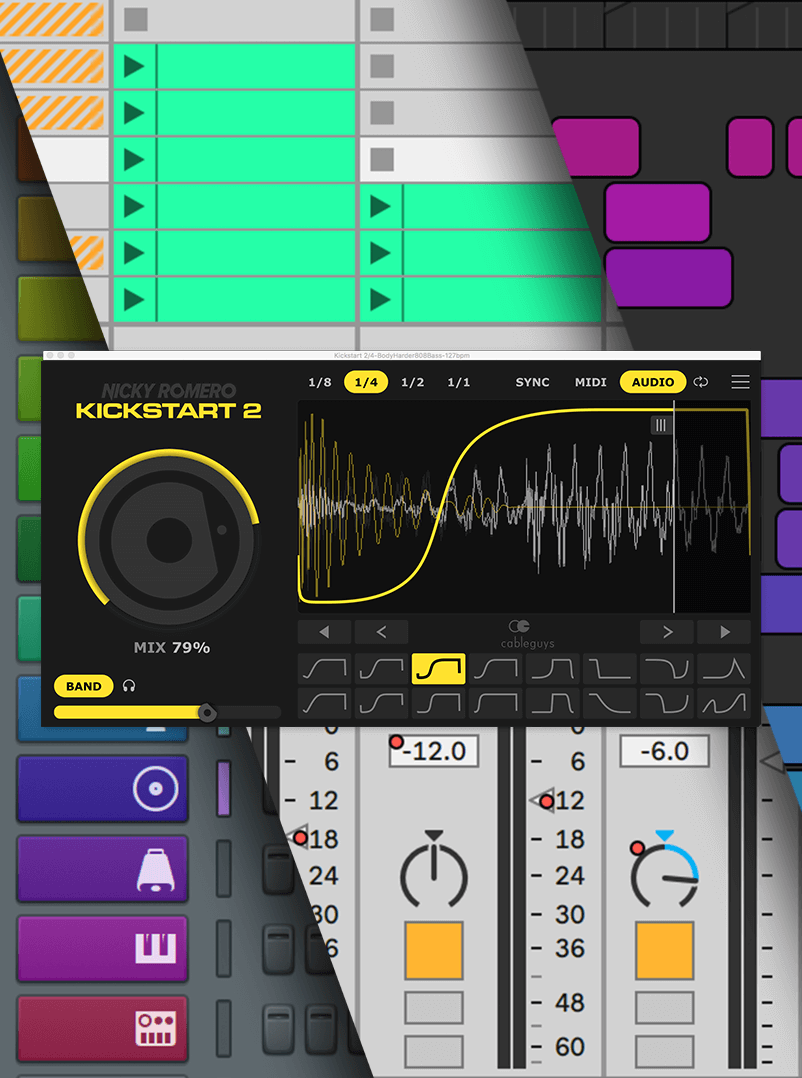
Add Kickstart – instantly get sidechain ducking, with no setup
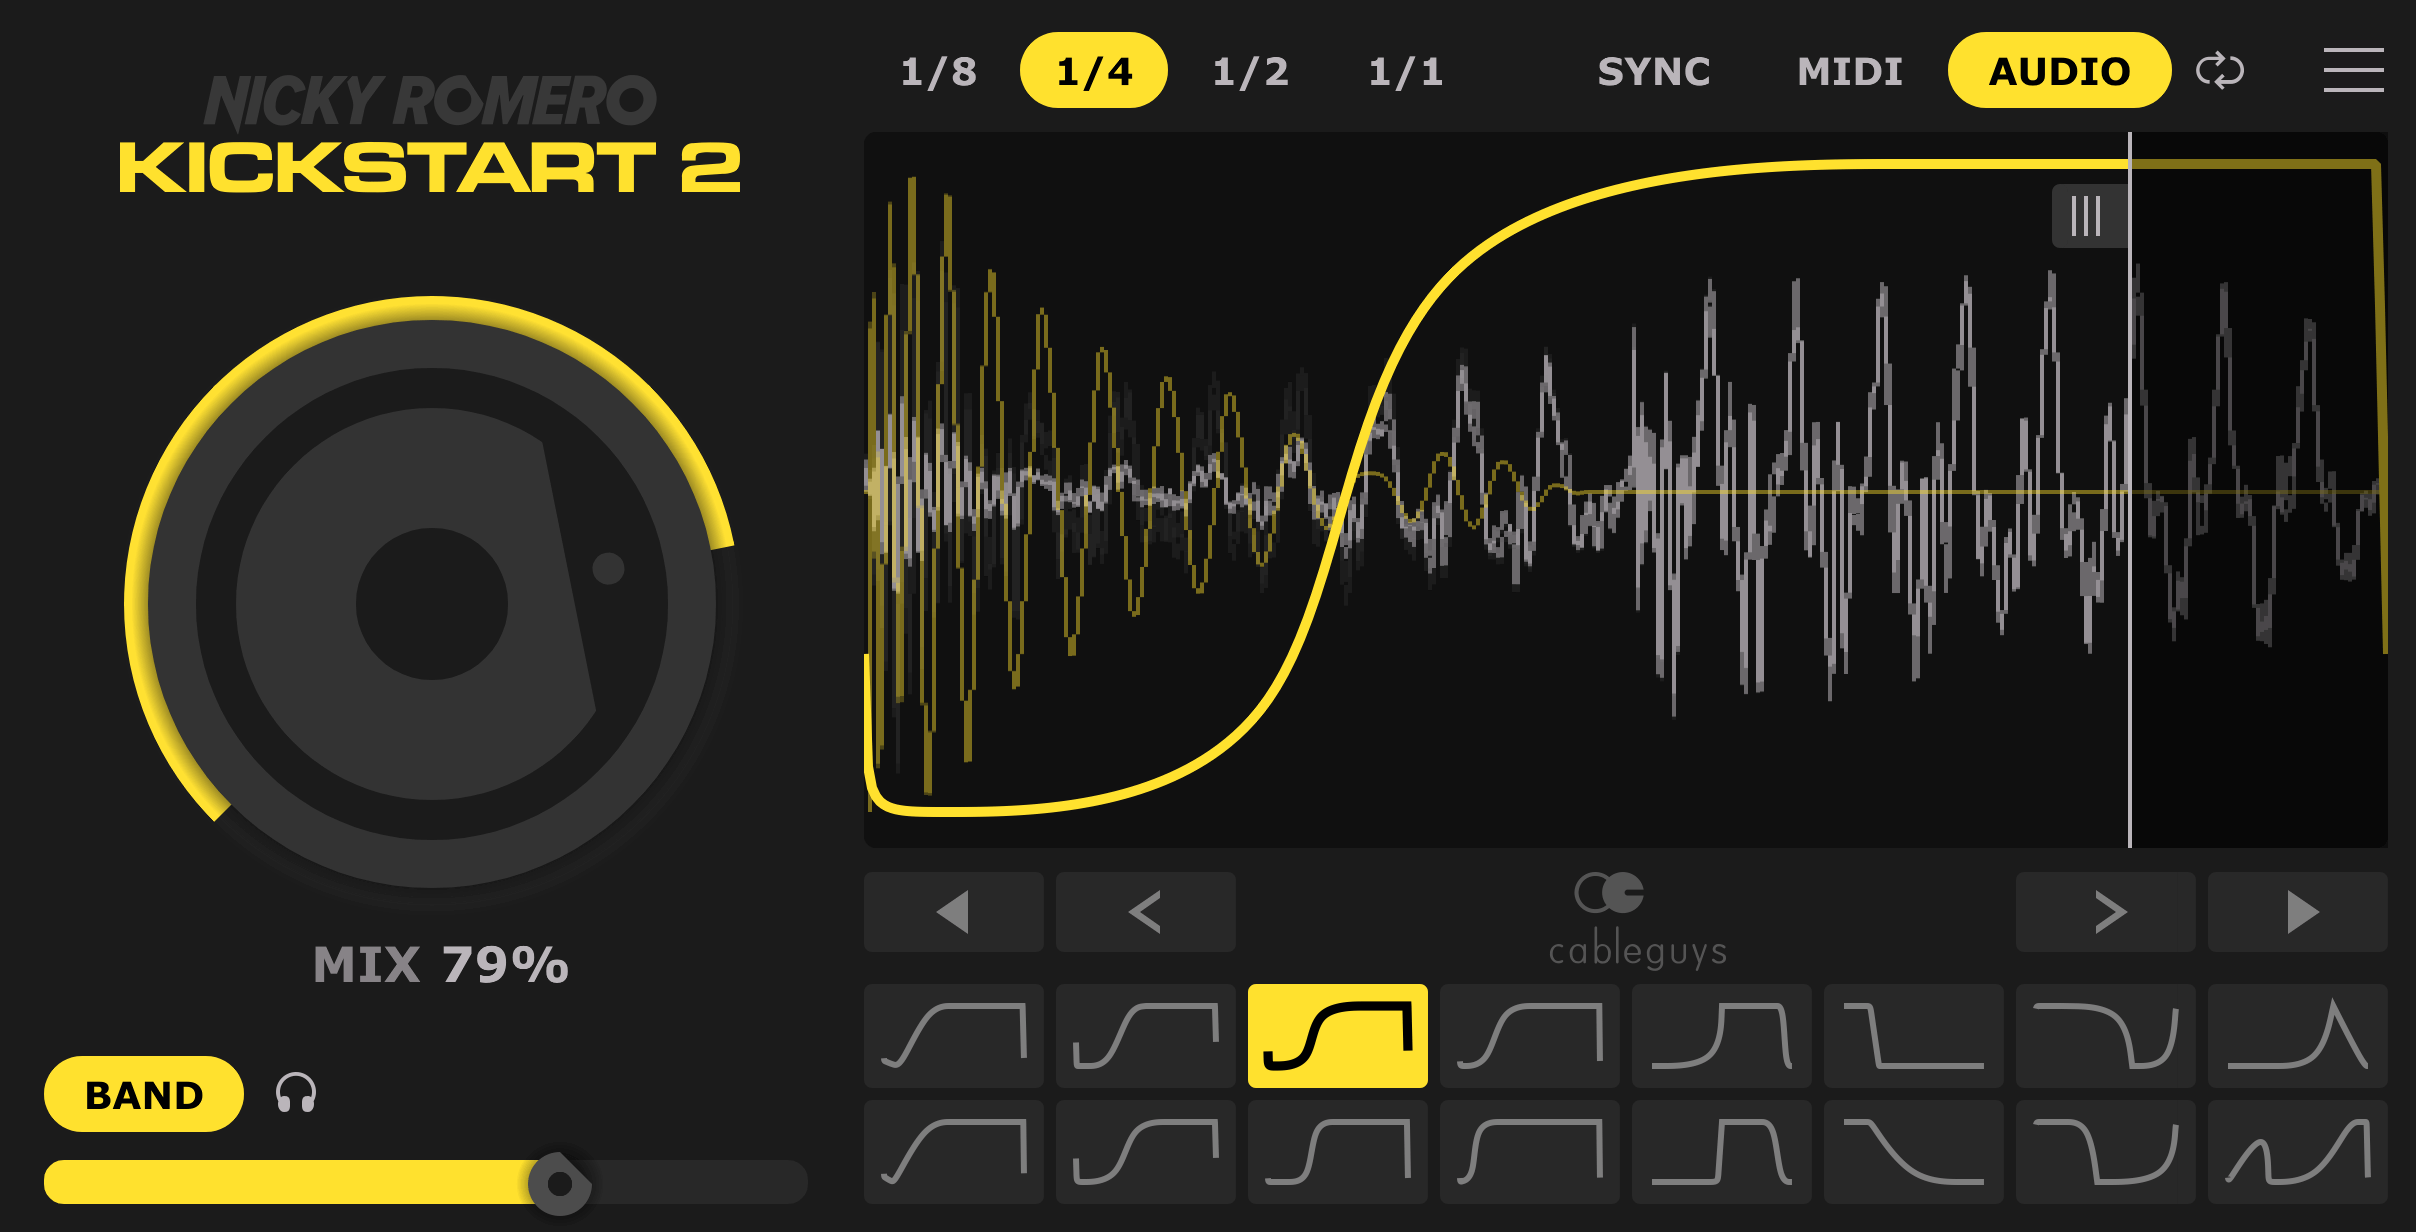
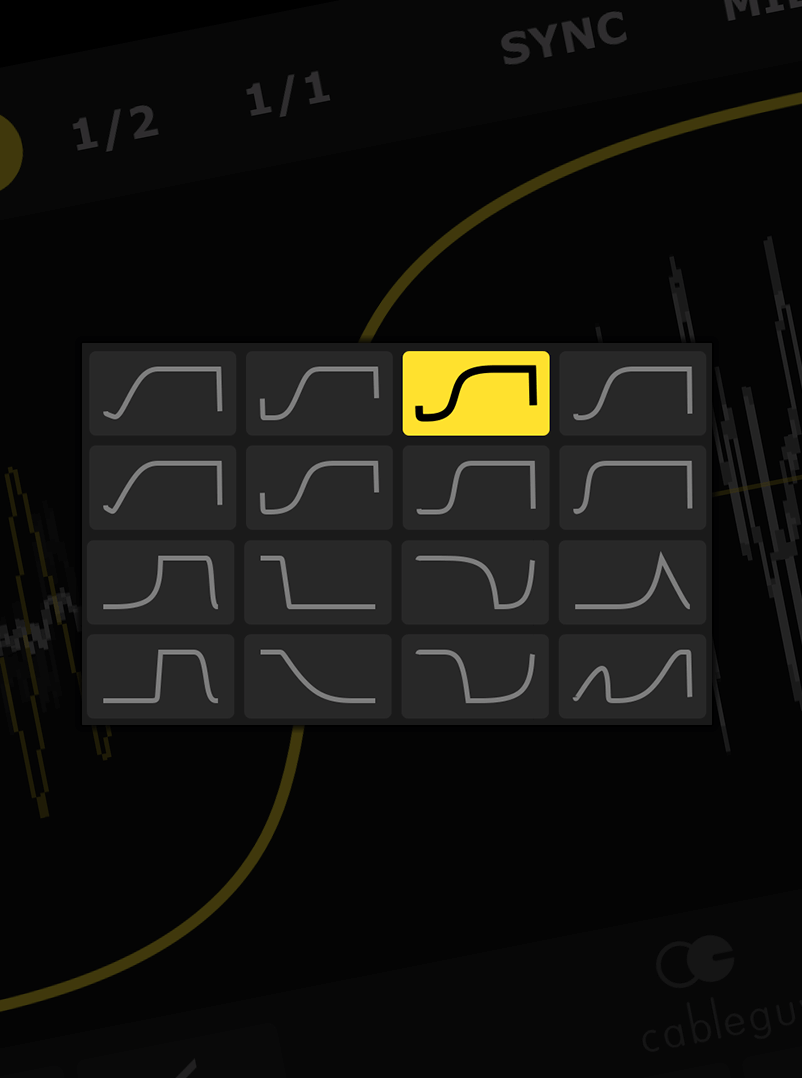
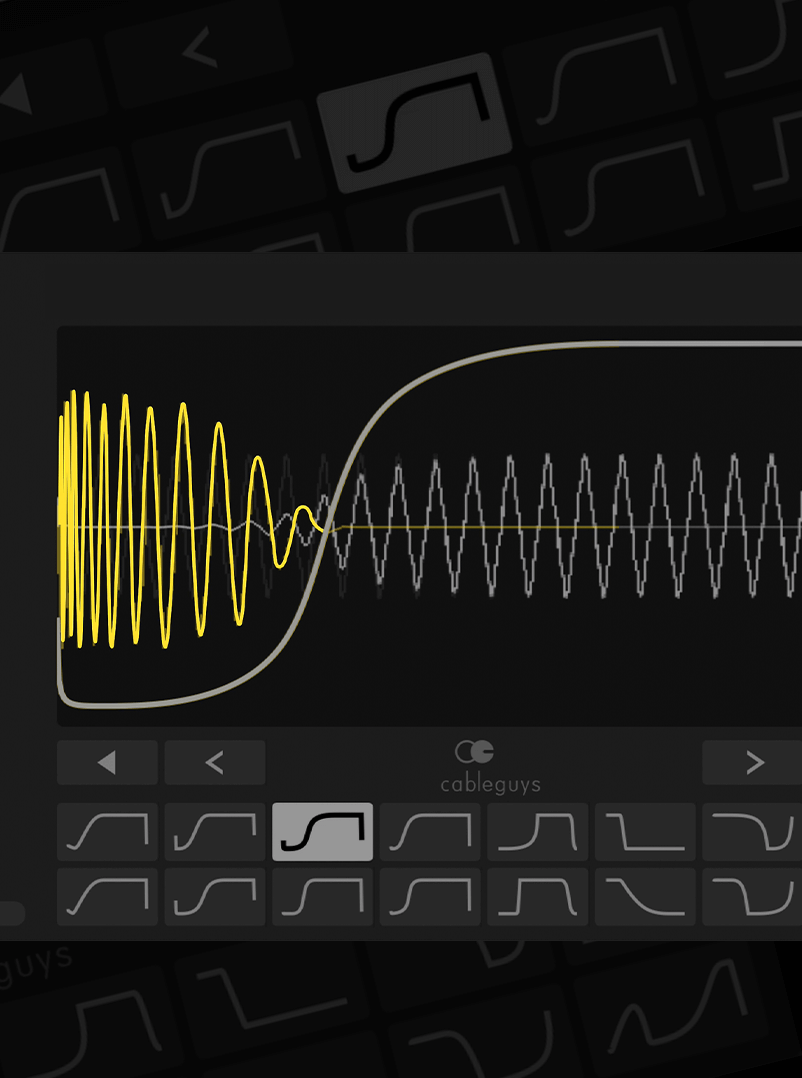
The exact curves Nicky Romero uses to get tracks sounding massive in the club Is that the new lighting
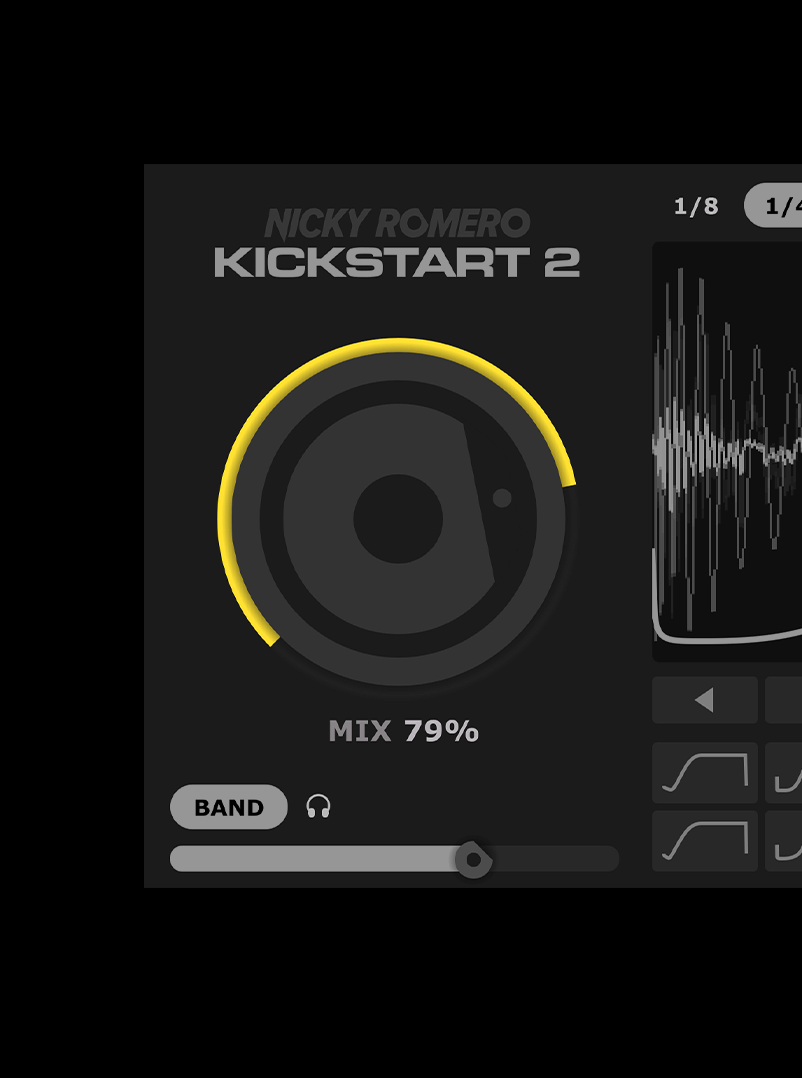
Easily adjust the strength of the sidechain effect to fit any mix
Forget complex editing tools – just drag the curve to fit any kick, long or short
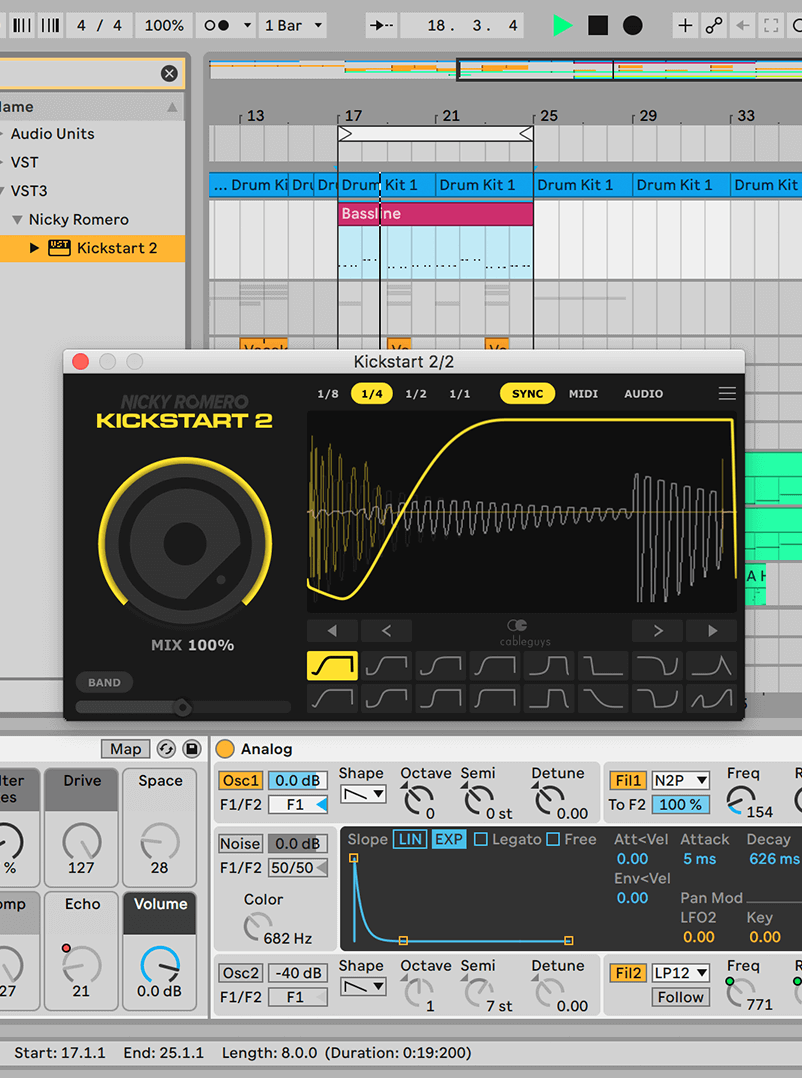
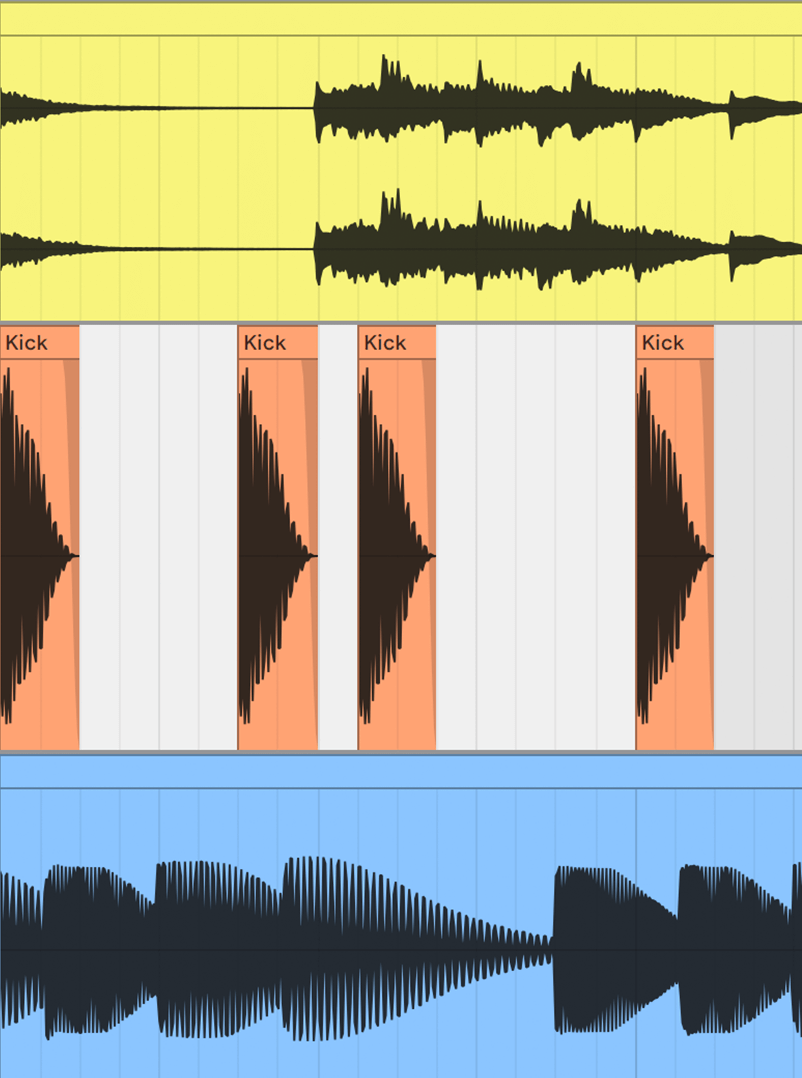
Kick not 4/4? No problem – Kickstart follows any kick pattern with new Cableguys audio triggering stays compatible across Windows and macOS
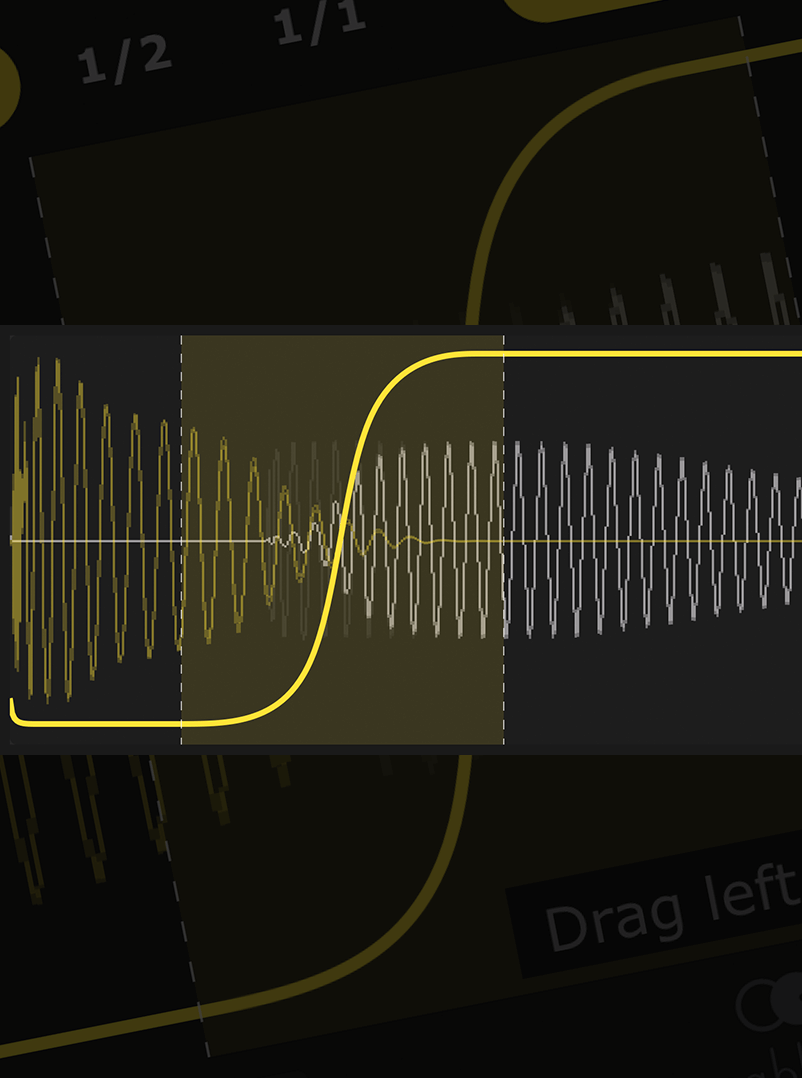
Easily duck only the lows of your bassline – the pros’ secret trick for tight bass with full frequencies
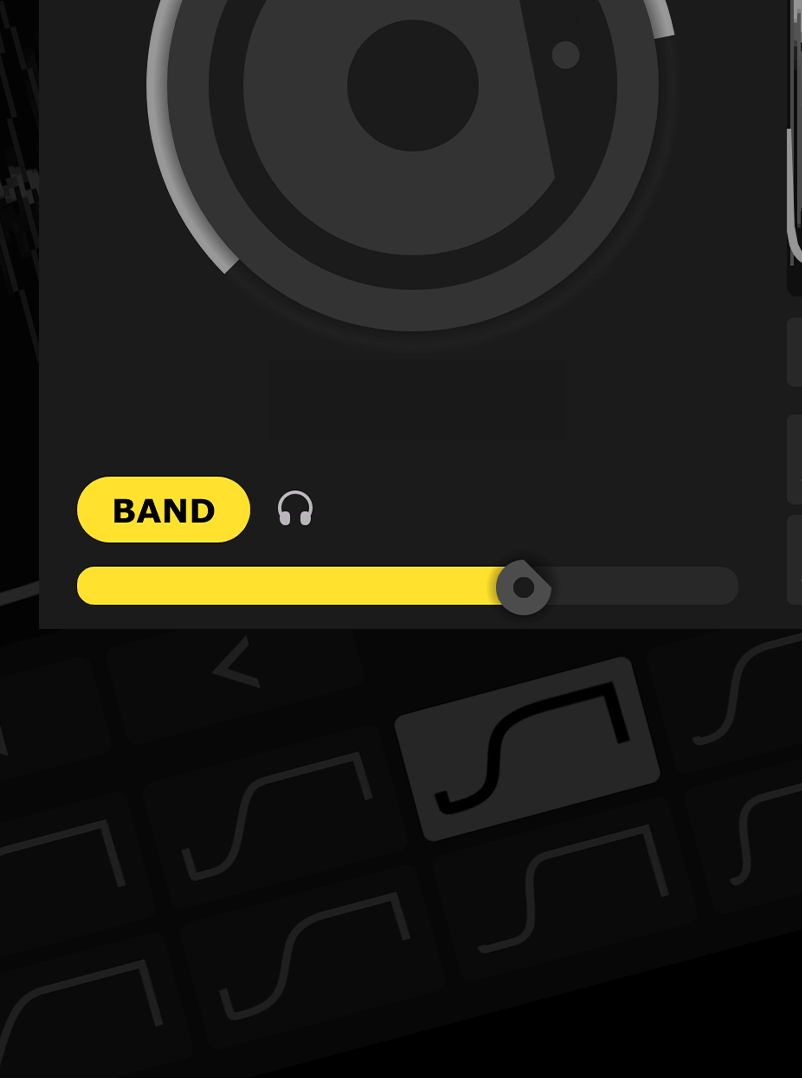
See kick and bass waveforms on the same display – get your lows locked tight like never before
What you work on (product visualization, motion graphics, VFX)?
Click on the or Settings gear icon within the browser window.
Dude. Is that the new lighting? It looks incredible. It looks... real. Where did you get that?
Numerous lighting tools are available for Cinema 4D, but HDRI Link stands out for several reasons:
With version 1054 installed on your Win/Mac machine, here is the professional workflow to achieve "out-of-the-box" renders.
. It serves as a bridge between Greyscalegorilla’s extensive HDRI library and major third-party render engines, allowing artists to swap high-dynamic-range images instantly without manual file browsing. SoftwareOne Key Features & Functionality Instant HDRI Swapping
Elias didn't turn around. He just stared at the screen as the render timer hit zero.
A chill ran down his spine. The file was supposed to be an environment map, but 1054 was acting like a window.
Elevate Your Renders: Greyscalegorilla HDRI Link 1054 Cinema 4D R20
Cinema 4D R20 handles plugins differently than older versions. It is highly recommended to use the path to define a custom plugin folder, though the legacy directory still works. Windows Installation Close Cinema 4D R20. Extract the downloaded HDRI Link zip archive.
On Windows systems, the plugin utilizes optimized memory handling to ensure that swapping massive HDR files does not trigger GPU or CPU bottlenecks. It integrates flawlessly with DirectX and OpenGL viewports in R20. macOS Integration
If you want to dive deeper into optimizing your rendering pipeline, let me know:
: Includes a rotation preview and lower-resolution options to speed up the iteration process before committing to a final high-resolution render. Custom Library Integration
Photorealistic rendering in Cinema 4D R20 requires precise, high-quality lighting. Greyscalegorilla HDRI Link revolutionized this workflow by eliminating the tedious process of manually loading high-dynamic-range images. This article explores how HDRI Link transforms your lighting pipeline, stays compatible across Windows and macOS, and maximizes the power of Cinema 4D R20. What is Greyscalegorilla HDRI Link?
Includes unique studio and outdoor environments specifically tuned for R20. Technical Integration with HDRI Link
Setting up the plugin takes under five minutes. Follow this standard production workflow to get started: